

Simplify your WordPress workflow!
Build faster, cleaner, and more reliable WordPress websites using lightweight plugins designed for real-world workflows.
Get started now
This guide takes you from an empty site to a working form. It takes a few minutes.
Forms have to be published to accept submissions. A draft, or a form behind a password, refuses them. If you can edit the form, you can still try it out while it is a draft.
A new form starts with three fields: Name, Email and Message.
Open the Presets tab of the form builder for a ready-made form:
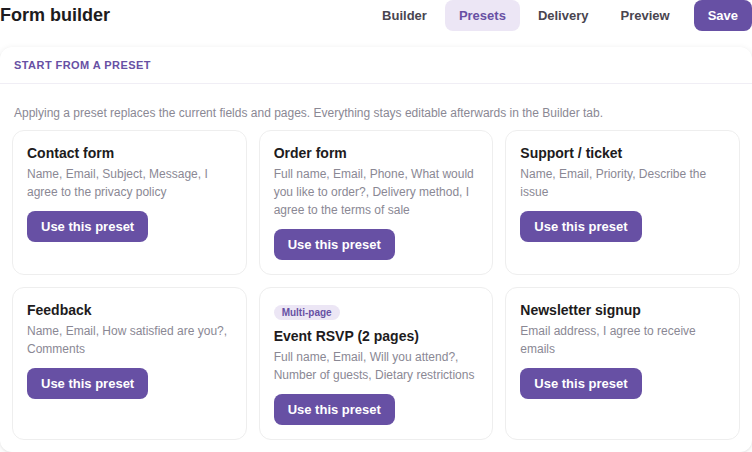
Click Use this preset. This replaces the current fields and pages. Everything stays editable in the Builder tab.
The Builder tab has the field types in a strip at the top, the form on a canvas and the settings of the selected field on the right.
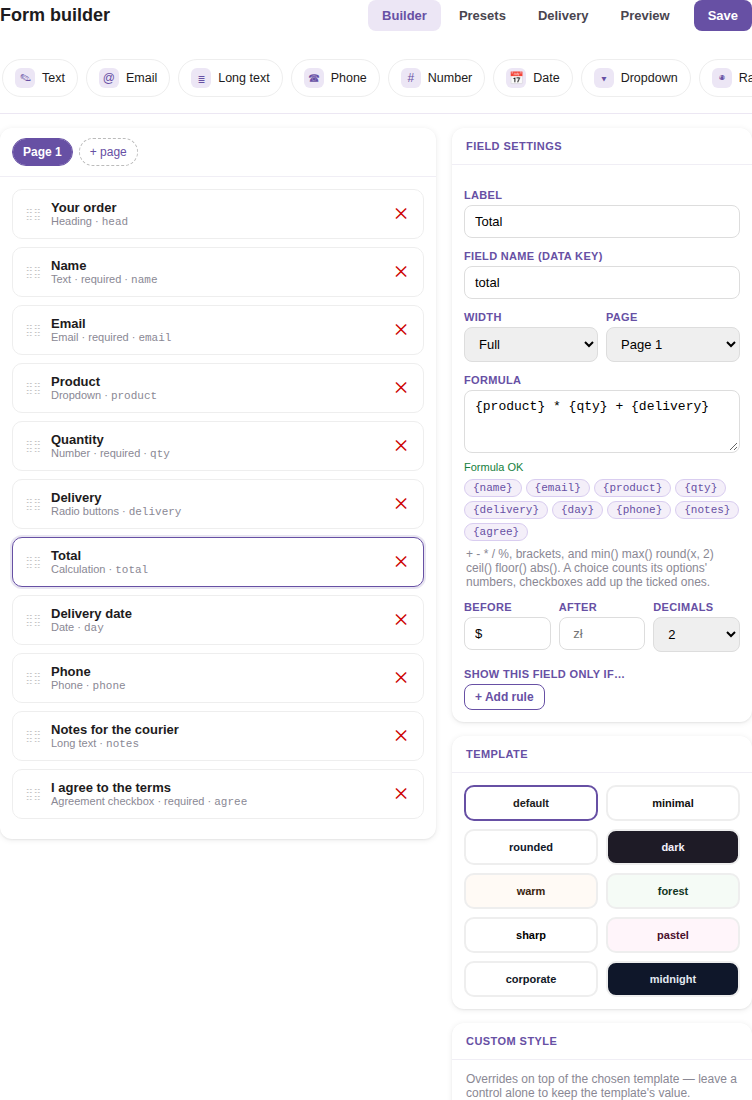
See Form fields overview for every field type and Configuring form fields for their settings.
The Preview tab shows exactly what visitors will see, in the display mode you chose.
Click Save in the top right corner of the builder. It saves the fields and all the builder’s settings.
Find the form in RB Forms → All Forms and copy its shortcode from the Shortcode column:
[rbform id="123"]
Paste it into a page or a post. That is all a basic form needs. For a popup or a chat bubble see Form display modes.
Send the form once from the page, the way a visitor would:
By default the notification goes to the site’s admin email. To change that, open the Delivery tab: see Delivery channels.
Build faster, cleaner, and more reliable WordPress websites using lightweight plugins designed for real-world workflows.
Get started now